Αρχείο
Αφαίρεση Κλειδαριάς Seat Cordoba
- βγάζω το κάλυμμα από το χερούλι τραβώντας το προσεκτικά και ξεβιδώνω τις 2 βίδες που αποκαλύπτονται .
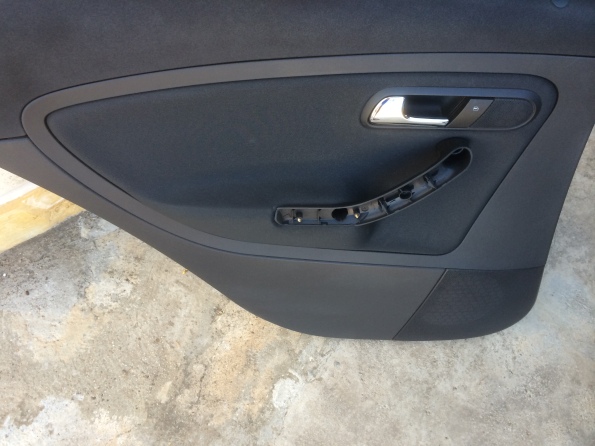
Seat Cordoba door cover
- βγάζω το κάλυμμα της πόρτας.
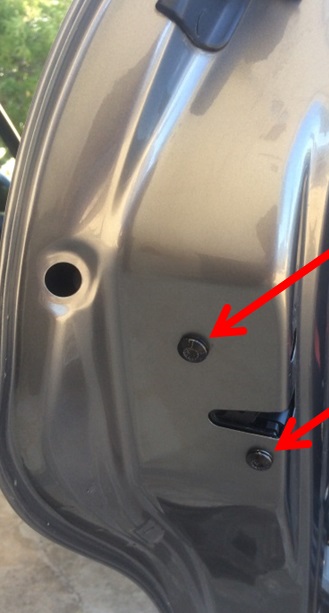
- από το πλάι της πόρτας βγάζω μια μικρή στρογγυλή τάπα, πάνω και αριστερά από τις πολύσφινες βίδες Νο 8.
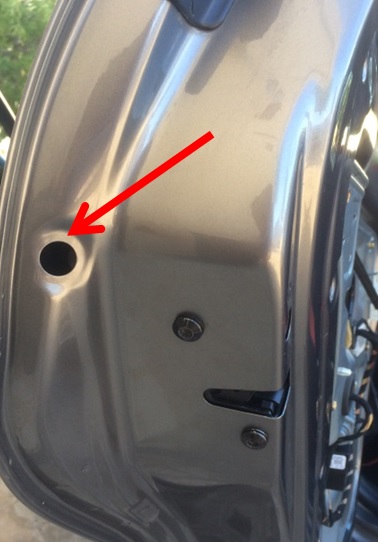
Τραβάω το εξωτερικό χερούλι προς τα έξω και αρχίζω να ξεβιδώνω αργά τη βίδα που κάλυπτε η τάπα μέχρι να ακούσω κλίκ και να μπορώ να τραβήξω το προστατευτικό που βρίσκεται πίσω από το χερούλι προς τα έξω.
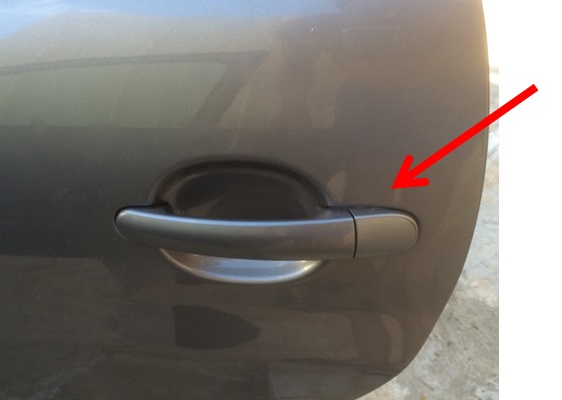
- απελευθερώνω το εξωτερικό χερούλι από το συρματόσχοινο.
- ανοίγω μια μεγάλη στρογγυλή τάπα που βρίσκεται στο πλάι της πόρτας και κατεβάζω το παράθυρο μέχρι να δω τον πύρο.

Ο πίρος αποτελείται από δυο πίρους ο ένας μέσα στον άλλο. Τους χτυπάμε ελαφρά να πέσουν μέσα στη πόρτα. Σηκώνουμε το τζάμι με το χέρι και το στερεώνουμε με ταινία για να μη πέφτει.
- βγάζω τα περτσίνια από το μεταλλικό προστατευτικό.
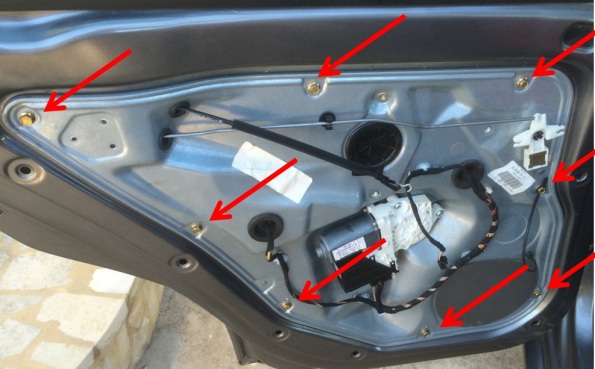
- ξεβιδώνω τις βίδες που συγκρατούν το μεταλλικό προστατευτικό.
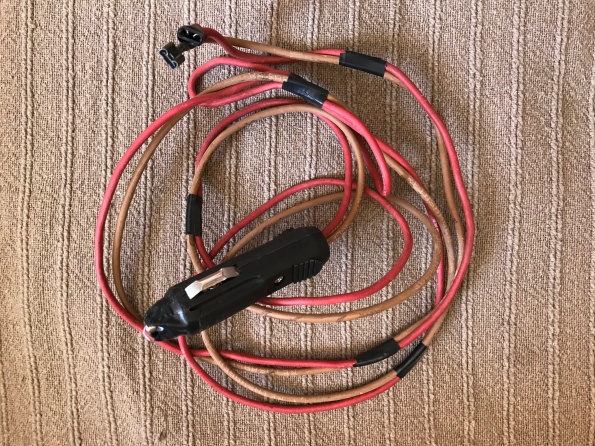
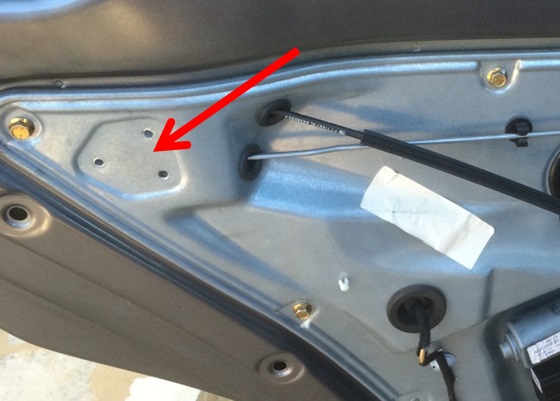
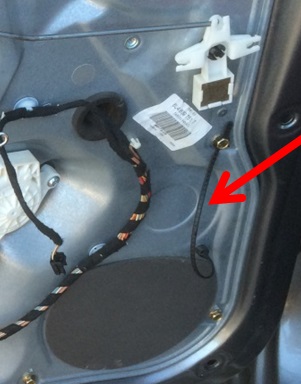
- ξεκουμπώνω το πλαστικό «σχοινί» που η προέκτασή του συγκρατείτε στο κεφάλι μιας βίδας για να μπορεί να κινηθεί ελεύθερα το καλώδιο που συγκρατεί.
- βγάζω τις βίδες της κλειδαριάς και την αφαιρώ.
Πριν ξεκινήσω τη συναρμολόγηση βάζω τους πίρους στο τζάμι. Όταν επανατοποθετηθεί το μεταλλικό προστατευτικό στο πλάι της πόρτας και
βγάλω τις ταινίες το παράθυρο θα μπορεί να μετακινηθεί προς τα κάτω και πέφτοντας με τον πίρο στη θέση του κουμπώνει και ασφαλίζει στο σύστημα που το ανεβο – κατεβάζει. ανοίγοντας ελαφρά το μεταλλικό προστατευτικό μπορώ να αποσυνδέσω το καλώδιο της κλειδαριάς ώστε να το αφαιρέσω.
- βγάζω τις βίδες της κλειδαριάς και την αφαιρώ.
Forerunner 310xt board
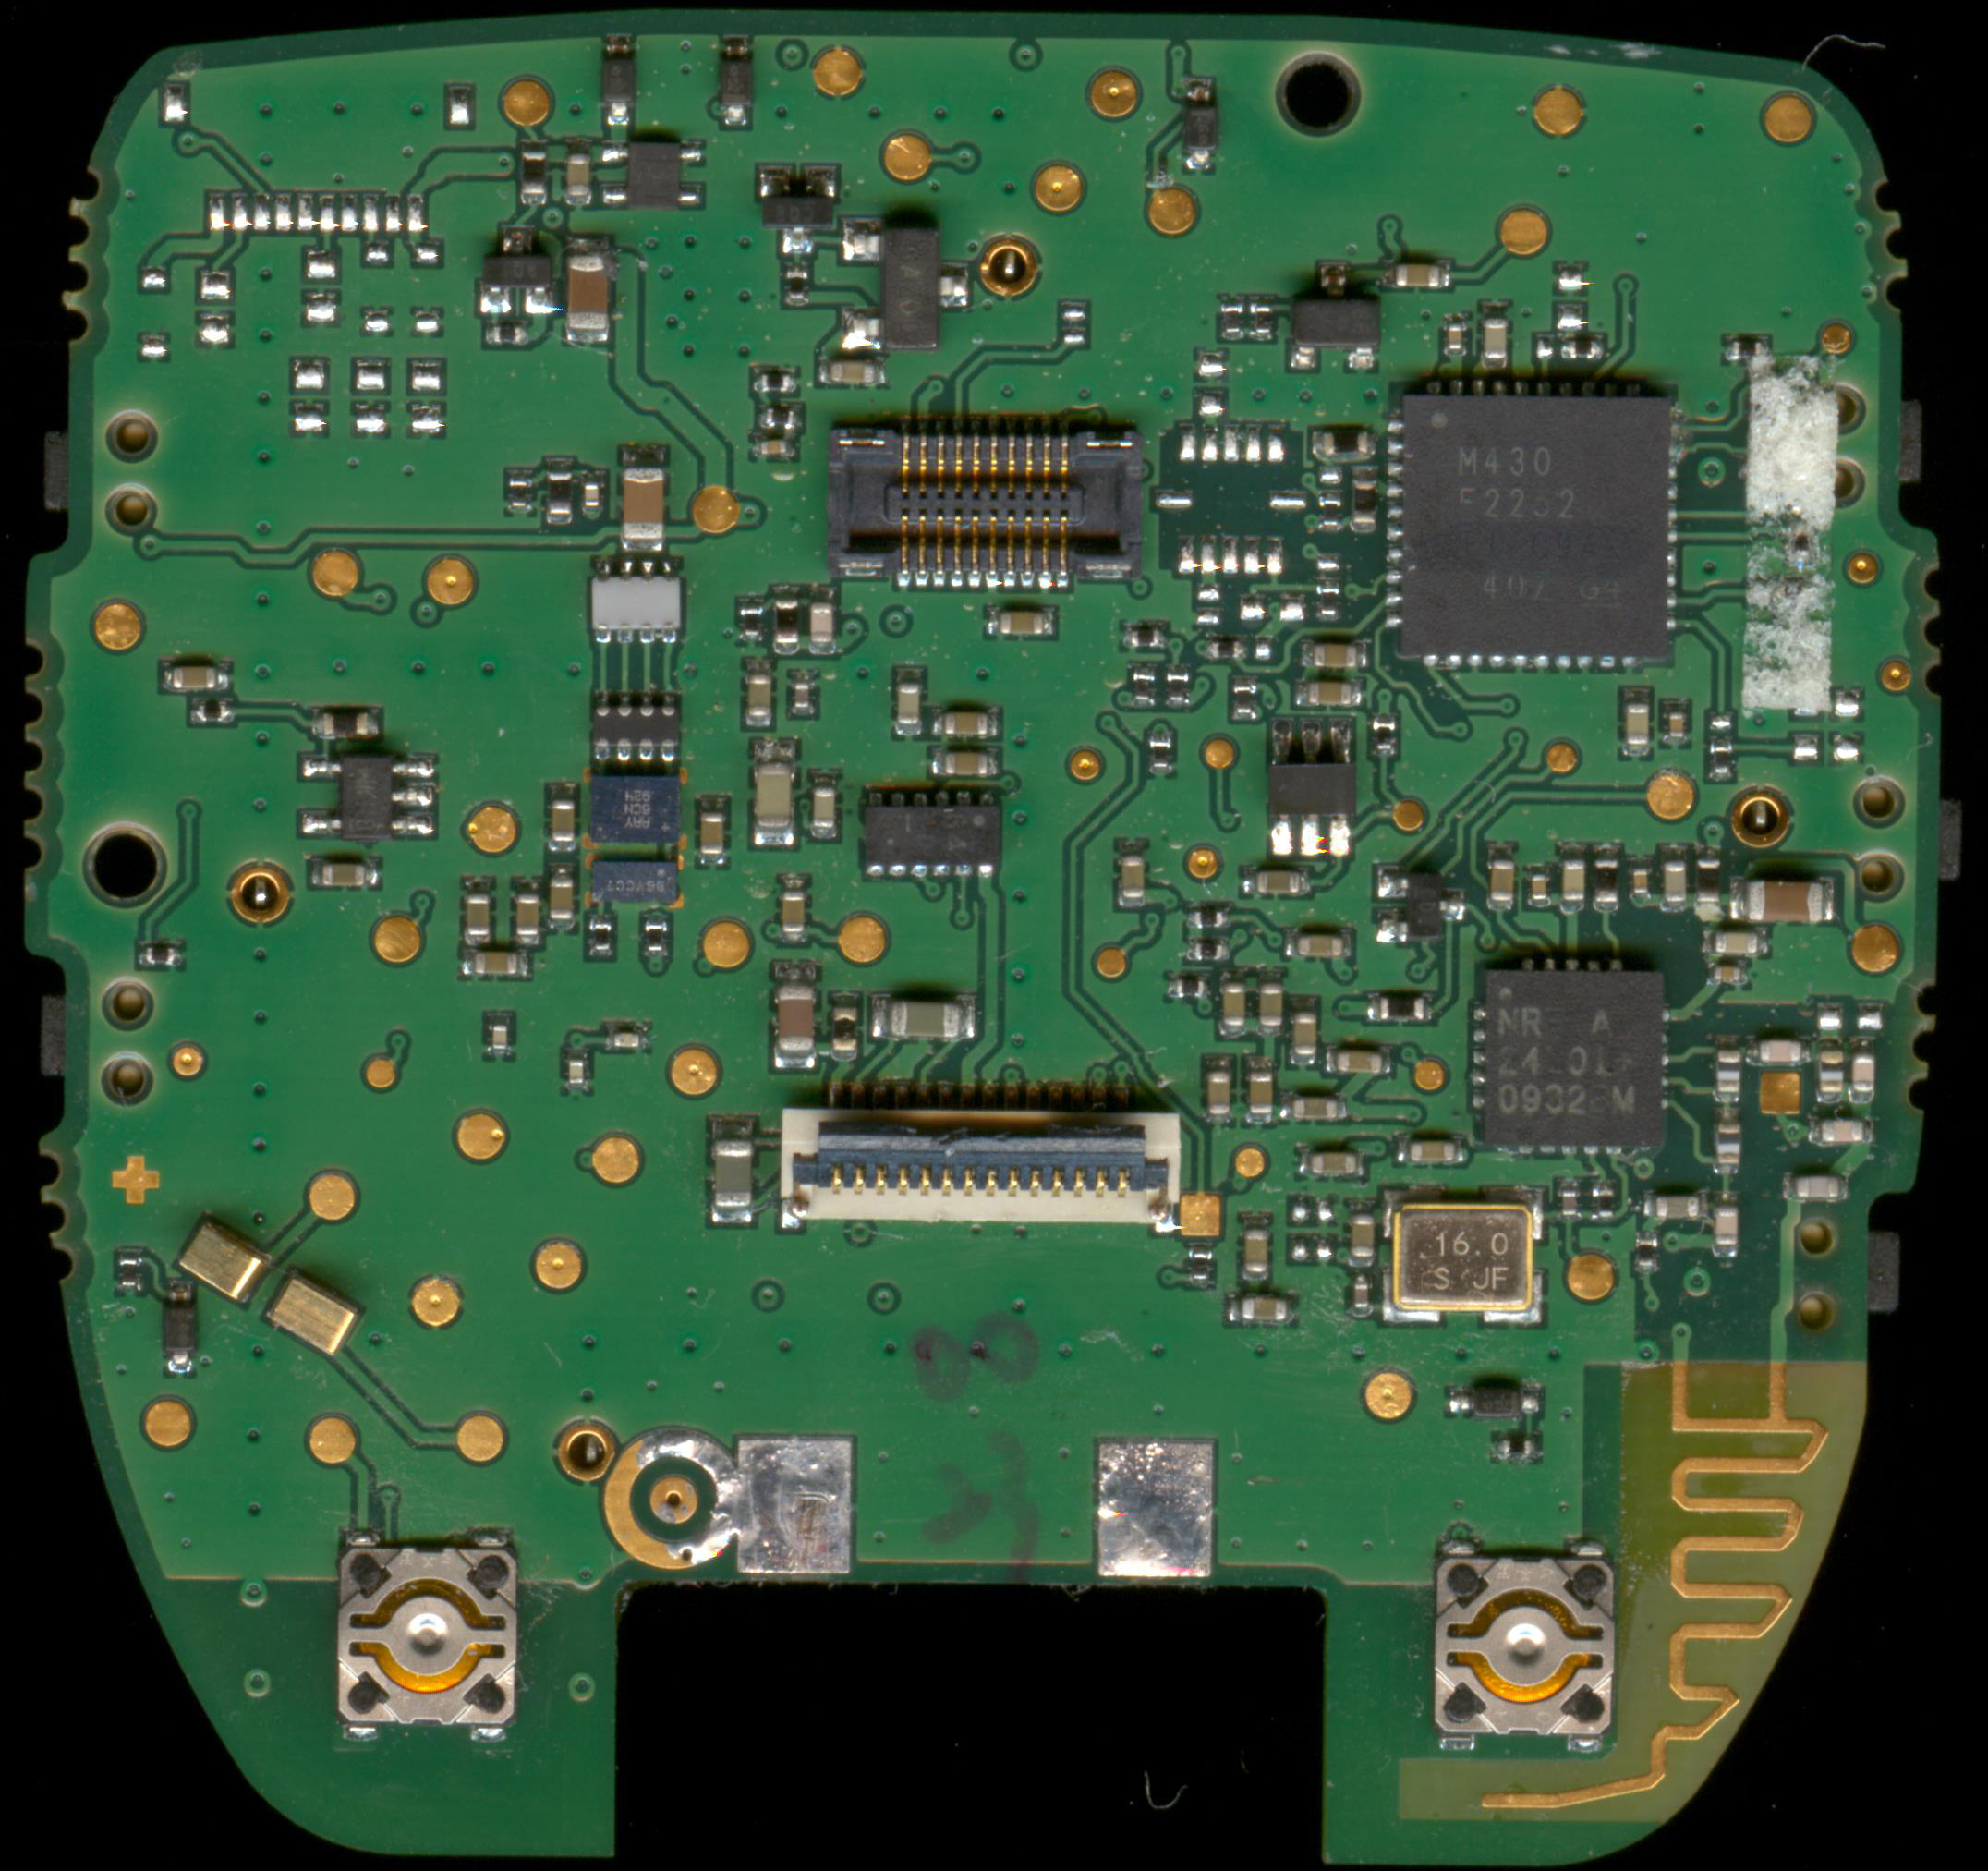
Forerunner 310xt board front side
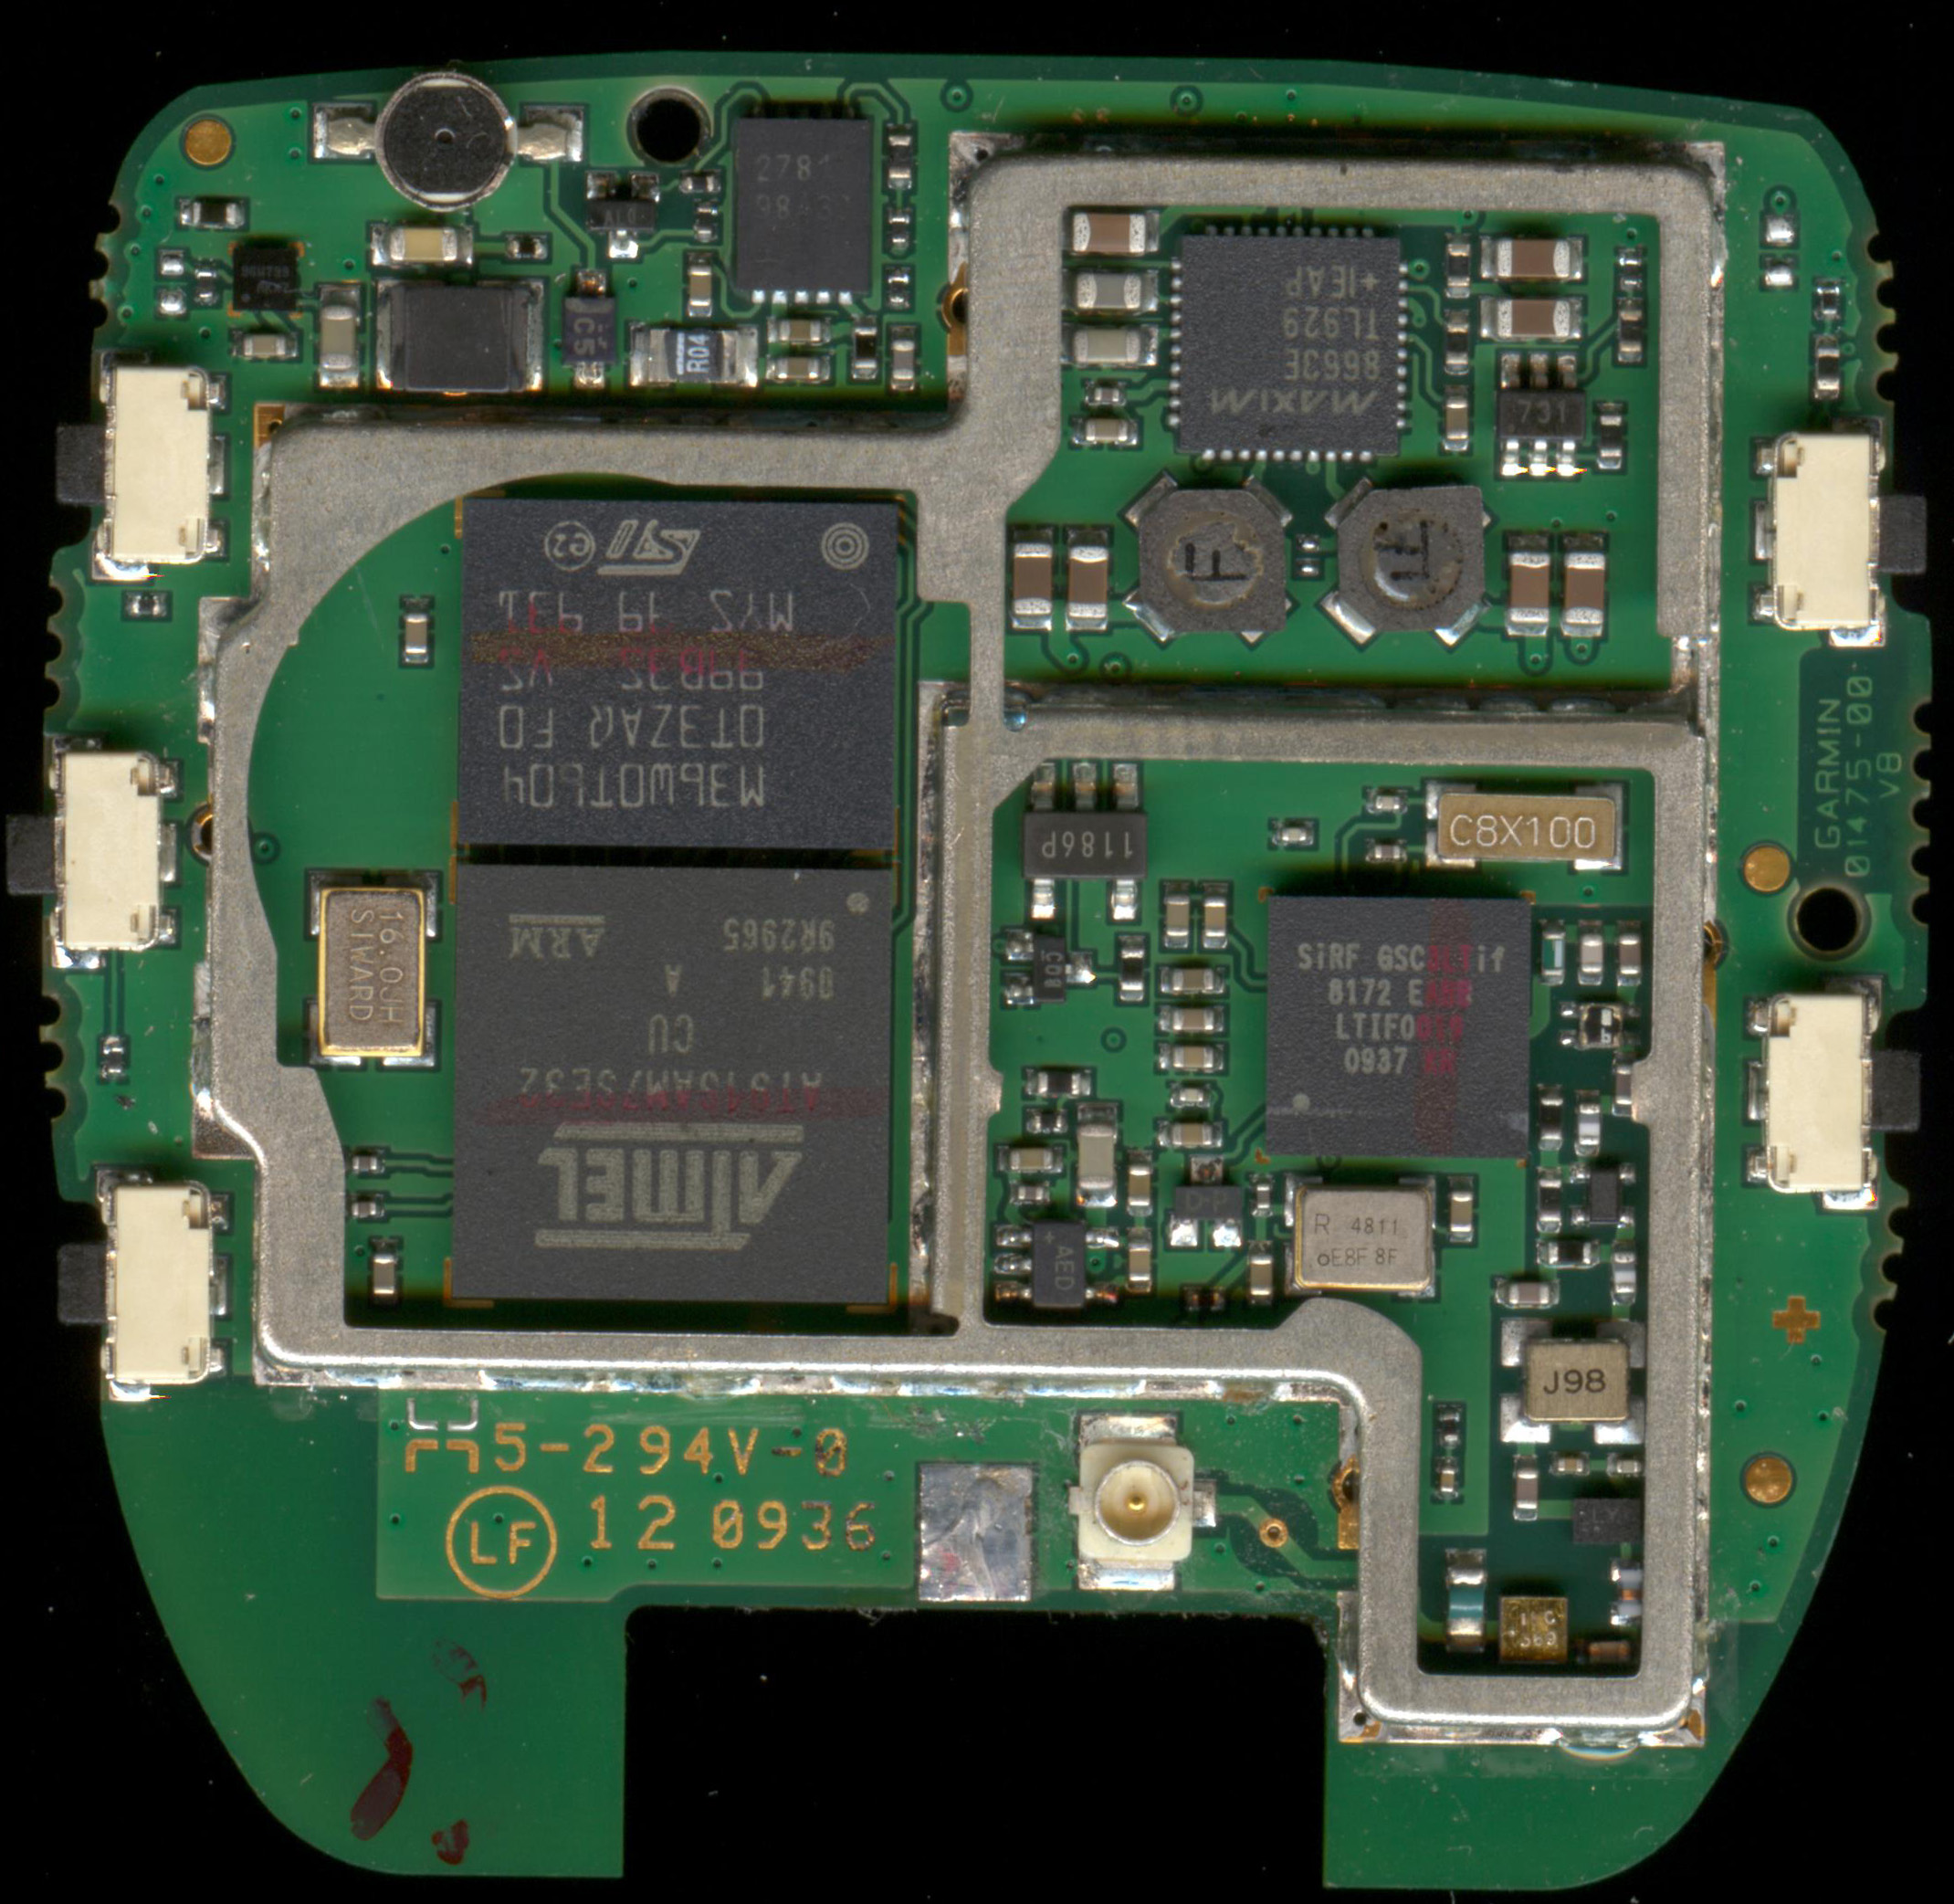
Forerunner 310xt board back side
Forerunner 310xt can’t locate or acquire any satellites.
Forerunner 310XT suddenly couldn’t acquire any satellites. I tried hard reset, re – locate the satellites but still no satelites were tracked.
When the watch was up side down the satellites could be located OK but when it was oriented the right position the satellites were lost again.
This made me assume that the problem was at the hardware. Due to the fact that it was not under warranty I decided to repair it myself.
Below I describe the procedure I followed to repair my forerunner 310xt.
Step 1
Using a blade separate the two parts by putting it in the small gap among them and pushing it gently from all sides of the watch.
Very careful and gentle moves are required otherwise the watch will end up with marks or even damage of the waterproof capability.

When the top cover comes off the parts inside the forerunner are accessible for service.

forerunner 310xt opened
Step 02
Remove the sticker which is holding the screen attached on the board.
With a small screw driver try to lift the screen.
Again very careful and gentle moves are required otherwise there is danger to harm the board or the back of the screen.

forerunner 310xt remove sticker
Here you can see the sticker which was holding the screen on the board.

forerunner 310xt screen sticker
Step 03
Remove the connector which connects the battery to the board.
Put a screw driver below it and gently push it up. It will make a “click” sound and will come off.

Now the board is free to come off.

forerunner 310xt battery conector removed.
Step 04
Somebody might want to remove the screen as well. I didn’t try it because I thought that it was risky and didn’t help.
Put the nose of the screw driver in a hole on the board and try pulling it up gently. It might give you some difficult time but finally it comes off.

forerunner 310xt removing the board

forerunner 310xt board has been removed
Step 05
Re-solder the GPS antenna cable at the point where the cable was soldered to the GPS antenna.
Probably at that point the solder had a crack and the cable was not touching the GPS antenna and that’s why it couldn’t acquire any satellites.

forerunner 310xt soldering the GPS anntena.
IMPORTANT: make sure that the conductor of the cable (A) and the braid shield (B) are not soldered together.

Gps Module soldering close up
After soldering you can use a multimeter to perform a continuity test between (A) and (B) OR between (A) and (C) to ensure that the solder hasn’t connected the conductor of the cable and the braid shield.
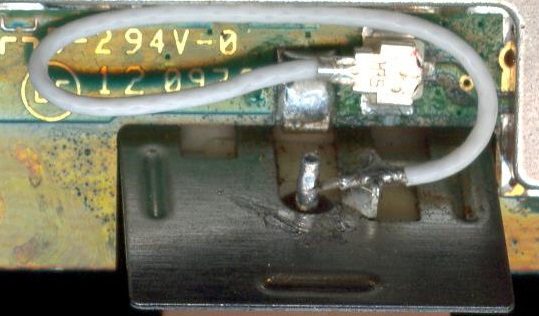
Proper Soldering

forerunner 310xt GPS anntena cable.
Step 06
Put the board back to it’s place.
Step 07
Put the battery conector.
Step 08
Put a small piece of double sided tape to replace this little sticker.
forerunner 310xt screen sticker
Step 09
Remove the grey “paste” in order to put the cover back to the body.
It can be removed very easily.

forerunner 310xt topcover inside
Step 10
Make sure the liquid crystal screen and the clear plastic don’t have any dust or fingerprints.
Comments about Step 11
I was troubled about finding a product to replace the grey “paste” Garmin had used, because it needs to have the ability
- Hold the two parts together tight.
- Retain the waterproof capability of the watch.
- The two parts can come off again if there is a need and the product can be easily removed and replaced.
I used Silicon RTV, product number 411 00 16580 – 4097.
If someone can find a better product or knows what Garmin used in the first place please let me know.
Step 11
Fill the gully with Silicon RTV and put the cover.

Step 12
Wipe the Silicon that comes off from the sides with kitchen paper and find a way to keep the two parts under pressure for several hours.
Better safe than sorry!
JOB DONE


forerunner 310xt satellites have been located
After running and swimming at the sea no issues came up, even after diving at 3-4 meters no leak was noticed.
You can also watch my youtube video
